How to Make a Product Demo Video from Screenshots (No Screen Recording)
Turn three to five screenshots into a product demo video: how to capture clean screens on Mac, Windows and Chrome, add camera moves and callouts, pace it and export.
To make a product demo video from screenshots, take three to five clean screenshots of the screens that tell one story, then animate them: a camera that moves across each screen, a zoom or callout on the part that matters, captions or on-screen text, and music that the cuts follow. Export a 16:9 MP4 and a vertical cut. You don't need a screen recording, and for a 10 to 30 second marketing demo the result often looks cleaner than one.
Below is the whole process, including when screenshots are the wrong choice.
Why make a demo video from screenshots?
Screen recordings capture everything, including what you don't want: a cursor that drifts, a loading spinner, a typo you fixed, the notification that popped up. Cleaning that up takes longer than the recording did.
Screenshots skip that. You pick the exact moment of each screen, with the right data in it, and the motion comes from the edit instead of from your mouse. That gives you:
- Control. Every frame shows the state you chose: full dashboards, no empty tables, no test names.
- Speed. Retaking one screenshot after a UI change takes seconds. Re-recording a flow means doing the whole take again.
- Reuse. The same screens work for the App Store, a landing page, a changelog and a sales deck.
- Privacy. You can blur or replace customer data before anything moves.
When should you record the screen instead?
Be honest about this one. Screenshots can't show motion that only exists in the product. Record the screen when:
- the interaction is the feature (drag and drop, live collaboration, a canvas, an animation you built),
- speed is the selling point ("results in 200 ms" needs to be seen happening),
- you're making a tutorial, where viewers copy each click.
A middle path works well too: screenshots for the story, plus one short recording for the moment that has to move. Our product demo video guide covers recordings and structure in more detail.
Step 1: Pick one story and three to five screens
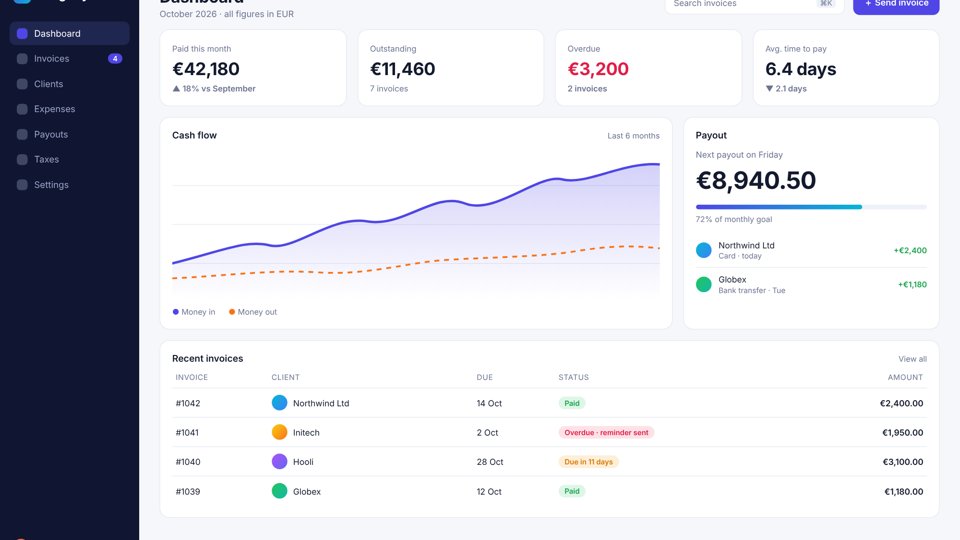
Start from the job the viewer should remember, not from your feature list. A good test: can you say it in one sentence? "Send an invoice and get paid without chasing" is a story. "Dashboard, invoices, clients, settings" is a tour.
Then pick the screens that prove the sentence, in order:
- The hook screen: the result, or the problem, in its clearest state.
- Two or three proof screens: one per step or benefit, each with one thing to point at.
- The end screen: your name, one line and the call to action.
Three to five screens fit a 15 to 30 second video. If you need eight, you're making two videos. How long a demo video should be breaks the length down by channel.
Step 2: Capture clean, sharp screenshots
The screenshots are your footage, so treat them like a shoot.
Prepare the screen first.
- Fill it with realistic demo data: names, numbers and charts that look lived in. Empty states rarely sell.
- Hide personal data, browser extensions, bookmarks bar and notifications.
- Use the same window size, theme and zoom level for every screen, so the cuts match.
- Make the browser window the size your viewers use. A 1440 px wide window is a sensible desktop default; for a phone app, use the phone's real size.
Then capture at full resolution. The camera will zoom in, so capture on a high-DPI (Retina) screen or at 2x if you can. Low-resolution screenshots turn soft the moment the camera moves closer.
| Where | How | Source |
|---|---|---|
| Mac, one window | Shift-Command-4, then Space, then click the window. Hold Option while clicking to leave out the window shadow | Apple Support |
| Mac, any area | Shift-Command-4 and drag; Shift-Command-5 opens the Screenshot app | Apple Support |
| Windows | Windows logo key + Shift + S opens the Snipping Tool: rectangle, window, full screen or freeform | Microsoft Support |
| Chrome, a web app | DevTools Command Menu (Cmd/Ctrl + Shift + P) → "Capture screenshot", "Capture full size screenshot" (the whole page) or "Capture node screenshot" (one element) | Umar Hansa's DevTools tips |
| Chrome, a phone-sized view | Turn on device mode, pick a device, then capture: the image matches that device's dimensions | Umar Hansa's DevTools tips |
A full-size capture of a long page is useful on its own: a tall screenshot can scroll inside a phone or browser frame, which reads as a feed or a landing page being explored.
Step 3: Add motion with the camera, not with effects
A still screenshot becomes video when something moves, and the most natural thing to move is the camera. A slow push towards the screen, a glide from the chart to the button, or a tilt that reveals the page from an angle all make a flat image feel filmed.
Keep it to one camera idea per screen. A push in on the hook, a glide between the proof points, a pull back for the end card. Our guide to camera moves for UI videos shows twelve of them side by side, with when each one fits.
Then point at things. On each proof screen, add one callout: a short label (three to six words) next to the element, or a zoom into it. If a screen needs two callouts, show them one after the other, never together.
Step 4: Pace it so each screen can be read
Viewers need time to find the callout and read it. In our templates, each callout stays up for 1.8 seconds and the next one starts about two seconds after the last, which is roughly the minimum that still reads. For a first video, two to three seconds per screen is a safe pace.
Two things make a screenshot video feel rushed:
- Moving the camera while a label is up. Let the camera settle, then show the text.
- Cutting on a random frame. Cut on the beat of the music, or at the end of a camera move.
Step 5: Add words: captions, on-screen text or a voiceover
Many people watch muted, so the story should work without sound. LinkedIn's own advice for video ads is to "think like a silent film director" and consider burned-in subtitles.
For a 15 to 30 second screenshot video, on-screen text is usually enough: an opening line, the callouts, an end card. If you add a voiceover, caption it, and keep the script short enough that you don't have to rush. Cut a screen rather than speed up the voice.
Step 6: Export one edit in three shapes
Make the landscape version first, then reframe the same edit for vertical and square feeds instead of rebuilding it.
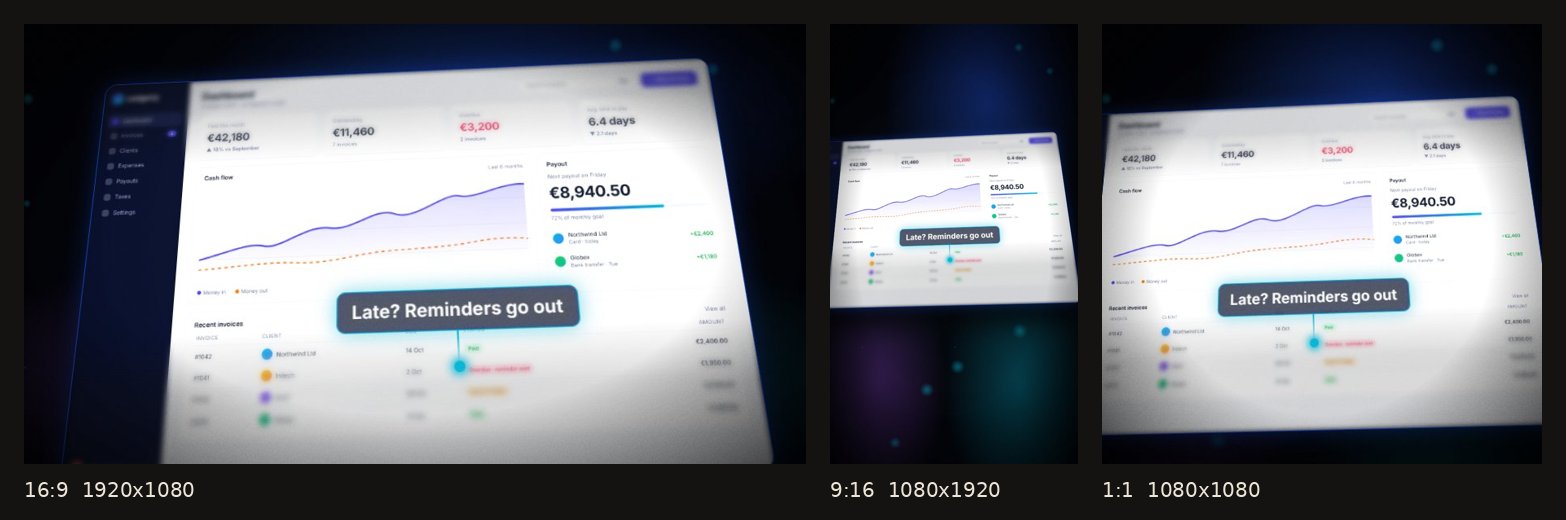
The exact pixel sizes and codecs for each platform are in our demo video sizes cheat sheet. The short version: 1920x1080 MP4 (H.264) as the master, 1080x1920 for vertical, 1080x1080 for square, and a short GIF or muted MP4 loop for READMEs and landing page heroes.
Which tools turn screenshots into a video?
| Tool type | Good for | Trade-off |
|---|---|---|
| Slides (Keynote, PowerPoint, Google Slides) | Simple moves between screens; Keynote's Magic Move animates objects from one slide to the next | Flat motion, no 3D camera; music and captions are manual |
| General editors (CapCut, Premiere, DaVinci Resolve) | Full control over every keyframe | You build every zoom and callout by hand |
| Motion design tools (After Effects) | Anything you can imagine | Steep learning curve; hours per video |
| Demo video tools built for screenshots (such as Lumora, ours) | Camera moves, callouts, device frames, captions and music in one place | Less frame-by-frame control than a full editor |
If you already have a designer who lives in After Effects, use that. If the video has to exist by Friday and nobody on the team edits video, a purpose-built tool is the faster route. Our comparison of demo video software covers the options in more depth, including when each competitor is the better pick.
How to do it in Lumora
- Upload your screenshots. Drop several at once and they become one sequence; a portrait screenshot goes into a phone frame automatically.
- Pick a look. A look sets the camera move, colours, effects and how the music hits. Keynote is calm; Close-up tour glides from feature to feature; Studio keeps the screen flat on a wallpaper.
- Add callouts. Add a callout at the playhead, type three to six words and anchor it on the element it points at. Or describe your product in one sentence and let the AI write the copy and point the callouts at the right parts of the screen.
- Check the timing. The timeline shows each callout and camera keyframe; drag them onto the beat.
- Export. MP4, GIF or WebM in 16:9, 9:16 and 1:1 from the same edit.
The free plan gives you 3 exports a month at 720p with a watermark, which is enough to try the whole flow. Start from a template or upload your own screens.
FAQ
Can you make a product demo video from screenshots only?
Yes. Three to five clean screenshots, a camera that moves across them, callouts on the parts that matter and music are enough for a 10 to 30 second demo. It often looks cleaner than a recording, because there is no cursor wobble, loading spinner or half-typed text.
How many screenshots do I need for a demo video?
For a 15 to 30 second video, three to five. Give each screen one job and one callout. If you need more than five, the video is probably trying to show more than one feature.
When is a screen recording better than screenshots?
When the motion itself is the point: drag and drop, live typing, real-time sync, an animation in your UI, or a flow where the speed of the product is the selling point. Screenshots can't show those honestly.
How do I take a high-resolution screenshot of a web app?
In Chrome DevTools, open the Command Menu and run Capture screenshot, Capture full size screenshot or Capture node screenshot. Device mode lets you capture at a phone's exact size. On a Mac, Shift-Command-4 then Space captures one window; on Windows, Windows logo key + Shift + S opens the Snipping Tool.
How long should each screenshot stay on screen?
Long enough to read one callout, usually two to three seconds. In our templates a callout stays up for 1.8 seconds and the next one starts about two seconds later.